When and how to refinish a stained wood front door
Learn when your wood stain door needs a fresh finish and follow step by step instructions to prep, stain and seal it against the weather.
 Reported by Jolene Imhoff
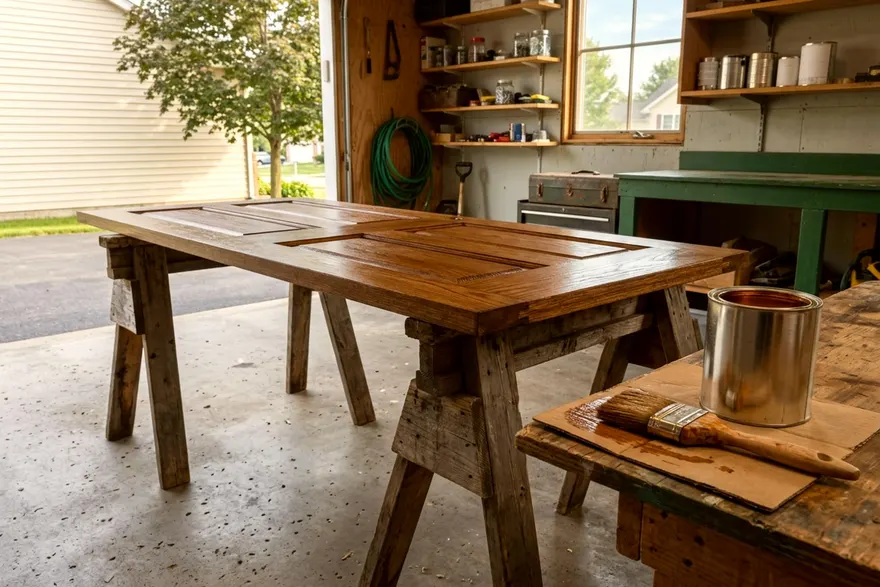
Sun and rain wear down a wood stain door fast. You know it is time for a new finish when water stops beading on the surface or the clear coat starts to flake. Sanding away the old finish, rubbing in fresh stain and brushing on an exterior topcoat will protect your entrance.
How to tell your door needs a new finish
Look at the lower half of your door first. The bottom panel takes the worst beating from rain splashing off the porch step. Doors that get strong sun and rain often wear fastest.
A good finish repels water. Toss a cup of water against the wood. If the water forms tight beads and rolls off, the seal is intact. If the water soaks in and leaves a dark patch, the raw wood is exposed.
Check the clear topcoat for a cloudy white appearance. Sun can break down varnish over time. That milky look often means the protective layer is failing.
Flaking or peeling at the corners of raised panels is another clear sign. Once the top coat splits, moisture gets under the film and lifts it away from the wood.
Check the door every spring for early wear
Do not wait for the finish to peel off completely. Catching wear early saves you from a massive sanding job. Every spring, wipe the door down with a damp rag.
Use a few drops of mild dish soap in a bucket of water to clean off dust and pollen. Rinse the wood with clean water and dry it with a towel.
Inspect the surface closely. If the color looks good but the shine is dull, you can do a light refresh. You can often complete this simple maintenance in one afternoon.
Scuff the old topcoat lightly with fine sandpaper. Wipe the dust off with a tack cloth. Brush on one fresh coat of exterior clear finish.
This simple habit keeps the barrier thick and strong. It stops the sun from reaching the stain underneath. Small upkeep steps like this make a huge difference, much like other ways to improve curb appeal from the street.
Take the door off its hinges to work
You can brush a single maintenance coat onto a door still hanging in its frame. A full refinishing job is different. Stripping old varnish and sanding bare wood is messy work. You will get much better results with the door lying flat.
Take the door off its hinges and move it to the garage. Working flat stops chemical strippers from running down the panels. It stops your fresh stain from pooling at the bottom of the molding. It also stops gravity from causing drips and runs in your wet clear coat.
Set up two sturdy sawhorses in the garage. Ask a neighbor to help you lift the heavy wood slab. Tap the hinge pins out from the bottom with a hammer and a nail.
Carry the door to the sawhorses. Unscrew the lockset, the handle, the hinges, and the knocker. Put all the screws in a plastic bag so they do not get lost.
Cover the empty doorway with a piece of plywood screwed into the frame to secure your house overnight. While the door is out, you might ask whether a storm door is worth adding permanently to protect your fresh work from future weather.
Choose a dry weekend with mild temperatures
Stain and varnish need specific weather to dry well. You will want a few dry days in a row, and the finish maker's directions will say how long it needs. Mild temperatures are ideal.
High humidity slows down drying times. If the air is too damp, the clear coat will stay sticky for days. A sticky door traps bugs and dust from the yard.
Avoid applying clear finishes in direct hot sunlight, and check the label for the temperature range. Heat can make the top layer skin over before the solvents underneath escape. That can trap bubbles that ruin the smooth look of the finish.
Working in the shade of your garage solves most of these problems.
Remove the old finish back to bare wood
Before you start, round up the right supplies, and in a house built before 1978 read the lead section below first. You will need:
- Chemical paint and varnish stripper to dissolve thick topcoats
- Plastic putty knives to scrape off the softened finish without gouging the wood
- An electric random orbital sander and sanding discs in coarse and fine grits
- Flexible foam sanding sponges for the molded grooves around the panels
- Mineral spirits and clean cotton rags to wipe away dust and residue
- Painter's tape to protect glass windows from stray sandpaper scratches
Getting down to bare wood takes time and patience. Thick layers of old varnish will clog sandpaper fast. A chemical stripper does the heavy lifting.
Read the stripper label for safety steps, then brush a thick layer over the door. Wait for the varnish to bubble up. Scrape the soft material off with a plastic putty knife. A metal scraper can gouge the soft wood.
Wipe the door down the way the stripper maker's directions say. Let the wood dry completely.
Now you need to sand away the old stain. An electric random orbital sander makes quick work of the wide, flat parts of the door. Start with coarse sandpaper to remove the color. Once the bare wood shows, switch to a finer grit to smooth away the scratches.
Do not use a power sander on the molded edges or raised panels. Power tools will flatten the sharp profiles and ruin the look of the door. Sand the curves by hand.
A flexible foam sanding sponge presses neatly into the grooves. Always rub in the same direction as the wood grain to avoid deep cross scratches. Tape off any glass panes with painter's tape to prevent scratches from rogue sandpaper.
Test for lead on houses built before 1978
Old houses often have old doors with forgotten layers of finish. A solid wood door may carry several old layers of finish. The EPA's lead renovation rule covers work that disturbs paint in homes built before 1978.
Sanding an old finish can release lead dust into the air and over your garage floor. The EPA says the rule generally does not cover homeowners working on their own home unless they rent all or part of it.
Even so, you need to protect yourself and your family. For do it yourself projects, the EPA recommends using lead safe work practices.
Ask at the hardware store about an EPA-recognized lead test kit, and follow its directions.
If the test shows lead, stop sanding and ask a lead-safe certified pro how to go on.
Follow the EPA's lead-safe work practices for cleanup, and ask your city's waste department how to dispose of lead waste.
Apply exterior stain and a clear protective topcoat
Wood stain provides the rich color that makes wood doors look classic. Stain does not seal the wood. It offers little protection from rain or snow.
Pick an exterior wood stain made for doors. Stir the can well with a wooden stick to mix the color pigments at the bottom. Dip a clean cotton rag into the stain. Rub the stain into the wood grain.
Work on one section at a time. Start with the raised panels, then move to the vertical strips, and finish with the horizontal rails. Let the stain soak in for as long as the stain maker's directions say.
Wipe away all the excess stain with a dry rag. If you leave wet puddles of stain on the wood, the clear coat will not stick. Wait for the stain to dry completely. Follow the stain maker's directions for drying times.
Now you must seal the wood. Buy an exterior clear finish made for doors, such as exterior polyurethane or spar varnish, and look for UV protection on the label. The maker's directions also say how many coats to apply.
Brush the clear coat on with a natural bristle brush. Apply a thin, even layer. Drag the brush lightly over the wet finish to pop any small air bubbles. Let it dry as long as the finish maker's directions say.
Sand the dry finish very lightly with fine sandpaper. This knocks down small dust bumps and gives the next coat something to grip. Wipe away the dust.
Brush on a second coat, and add more if the maker's directions call for it. Let each coat dry and sand lightly between coats.
Seal the bottom edge and rehang the door
The bottom edge of the door is the most vulnerable spot. Water sits on the threshold and the raw wood acts like a sponge. It soaks up the moisture and causes the door to rot from the bottom up.
While the door is off the hinges, look at the bottom edge. Sand it clean and wipe on a coat of stain. Once that dries, brush on a thick layer of your clear finish.
A well-sealed bottom edge stops water from wicking up into the wood fibers. Do the same for the top edge of the door to block humidity.
Let the final coat of finish cure in the garage until the maker's directions say it is ready. You do not want the fresh varnish to stick to the weather stripping in the door frame.
While the door dries, clean up your hardware. The lock, handle, and hinges might be dirty or tarnished.
Soak the metal parts in warm soapy water. Scrub away old grime with a soft brush. Dry the pieces thoroughly before you screw them back onto the fresh wood.
Screw the hinges back onto the door slab. Reattach your lockset, handle, and any decorative hardware. Carry the door back to the porch. Line up the hinge plates and drop the metal pins into place.
Check that the door swings freely and closes tight against the weather seal. A freshly stained slab often makes the surrounding frame look shabby. Exploring modern front door ideas can help you pick new trim colors and hardware that suit the fresh wood grain.
More from down the street
What is making small holes in your yard and what to do
Find out what is making small holes in yard areas by checking the size, shape and mounds, then decide how to repair the lawn and stop the digging.
How to keep porch floor boards sound year after year
Keep wood porch decking sound year after year with this practical spring routine for inspecting, cleaning, and safely sealing your front porch deck.
9 things not to store in your garage and where they belong
Find nine things in a garage you should never store there to protect your house from fire and pests, along with exact steps to safely move or discard them.