How to keep porch floor boards sound year after year
Keep wood porch decking sound year after year with this practical spring routine for inspecting, cleaning, and safely sealing your front porch deck.
 Reported by Jolene Imhoff
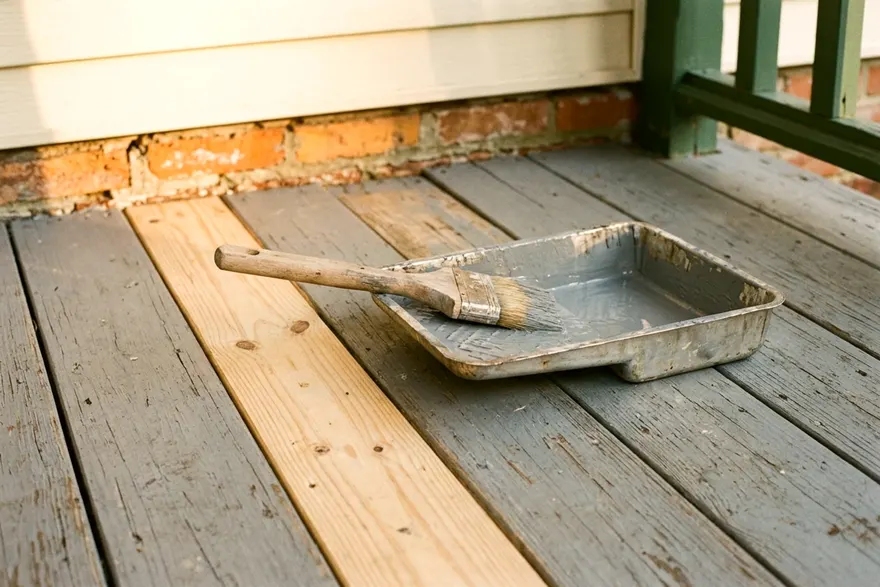
April or May is the time to check your wood porch decking for soft spots and popped nails. Sweeping away winter debris and touching up the finish blocks out the rain and snow that cause wood to rot. Catching small problems early keeps your floor strong and can save you the cost of a major rebuild.
A spring walk over every board
Walk the entire porch floor once the snow melts. Grab a broom and sweep the boards bare first. A clear view makes the inspection easier. Bring a few basic tools:
- A heavy flathead screwdriver to test soft spots
- A carpenter pencil to mark bad boards
- A small piece of paper to note which supplies you need
- A hammer to tap the wood and listen for decay
Step firmly on every board from one end of the porch to the other. Feel for a slight give under your shoe. Wood fails from moisture.
Covered porches get less direct rain but still take a beating from blowing snow and humid summer nights. Check the edges where the porch decking meets the house siding. Water pools in those tight corners.
Look closely at the stairs. The bottom stair tread takes the most moisture from the damp yard. Pay attention to the drip line where the roof runoff hits the ground.
Splashing water throws dirt onto the edge of your porch decking. This dirt traps dampness against the wood. Fixing a broken gutter or redirecting runoff near your front walkway helps keep the porch dry.
Look around the base of your porch columns. Trim boards hold water against the column base and the floorboards underneath them. A rotting base is a sign it is time to choose porch columns made from better materials.
Signs of rot and soft spots
Rot creeps into wood quietly. Healthy wood sounds solid when you tap it with the wooden handle of a hammer. Decaying wood gives off a hollow or dull thud.
Take your flathead screwdriver and gently poke any dark spots. Test peeling paint spots too.
The wood should resist the metal tip completely. The wood fibers are breaking down if the tip sinks in easily. Mark any soft spots with a carpenter pencil so you can find them again.
Pay special attention to the ends of the boards. End grain acts like a bundle of tiny straws. It sucks up water faster than the flat top face of the board.
Check the gaps between the boards next. A front porch deck needs a small gap between each board to shed water and let air circulate. Pine needles and maple seeds wedge into those narrow gaps. They form a wet sponge that holds moisture against the sides of the boards.
Look for splintering and deep cracks. A narrow crack is normal wood behavior as the temperature changes. A wide split that catches the edge of a shoe holds standing water and speeds up decay.
Clean without gouging the wood
Wash the floor on a cloudy day. Direct sun dries soapy water too fast and leaves a hazy film on the wood. Mix warm water and a basic wood deck cleaner in a large bucket.
Skip the pressure washer for this job. High pressure can gouge soft wood fibers and leave the surface rough. A rough surface catches dirt and splinters easily under bare feet.
Scrub the boards with a synthetic bristle brush on a long handle. Work along the grain of the wood in small sections. Keep the brush wet. The USDA Forest Products Laboratory says a bristle brush cleaning is usually enough before recoating penetrating finishes on decks.
Rinse the floor thoroughly with a regular garden hose. Wash all the soap residue off the wood and out of the narrow gaps. Give the wood plenty of time to dry before you apply any new finish. Trapping water under fresh paint can make the new coat peel.
Reset popped nails and replace a single board
Wood shrinks and swells with the weather. This seasonal movement slowly forces old nails up out of the framing. A popped nail head catches feet and catches snow shovels.
Do not hammer an old nail straight back into its hole. The wood fibers are already loose and the nail will just pop up again. Pull the old nail out with a cat's paw pry bar.
Put a thin piece of scrap wood under the pry bar to protect the floorboard from dents. Drive a galvanized deck screw into the same hole. The screw threads bite into the solid joist below and pull the board flat.
Sometimes a single board rots while the rest stay firm. You can replace one bad piece of front porch decking without tearing up the whole floor. Check the thickness of your existing boards before you buy lumber. Older homes sometimes use boards that are thicker than the lumber sold at a standard hardware store.
Pry up the damaged board carefully. Pull it free from the joists. Measure the empty gap. Cut a new piece of treated pine or cedar to match the length exactly.
Wood rots fastest where you cannot see it. Coat the hidden ends and the bottom of your new board with wood preservative before you drop it into place. Drive deck screws through the new board at every joist to hold it tight.
Choose the right finish for a covered porch floor
A good finish repels water and prevents cracks. You have a few main choices for a wood porch floor.
Penetrating finishes soak deep into the wood fibers. They show the natural grain and they are less likely to peel than paint. The Forest Products Laboratory says penetrating finishes on decks need refinishing every 1 to 2 years.
Stain provides color while still letting the wood breathe. Semi-transparent penetrating stains suit decks and porches better than solid color ones. The Forest Products Laboratory says solid color stains should never be used on flat surfaces such as decks and porches. Solid stain sits directly on top of the wood and is likely to peel under shoes and sliding chairs.
Paint offers the most color options but requires the most preparation. Paint forms a film that is likely to peel under wear. The Forest Products Laboratory says paint can work on roof protected porch floors if the wood is first treated with a paintable water repellent preservative, then primed and given porch and deck enamel.
Repaint or restain on a schedule
Set a rhythm for your porch maintenance. Inspect the floor every April. Clean it thoroughly in May.
Recoat the wood only when it shows signs of wear. Watch the weather forecast before you start painting. You need dry days so the paint can bond with the wood fibers.
Water should bead up tightly on the surface of your front porch deck. Pour a cup of water on a high traffic spot near the stairs. Tight drops suggest the finish is still working. The floor needs a new coat if the water soaks in and turns the wood dark within a minute.
Scrape away loose flakes before you touch up a painted floor. Sand the edges of the scraped spots smooth so the new paint blends in flat. Spot priming bare wood helps the final coat stick tight.
Apply the finish with a roller and back brush it into the grain. Work back toward the stairs so you do not paint yourself into a corner. Keep heavy items off the fresh finish until it cures. You might want to try some new porch decor ideas once the paint is fully hard.
Lead paint caution in older homes
Houses built before 1978 may have layers of old lead paint on porches and siding. Scraping or sanding that paint can create toxic dust. This dust travels easily on shoes and blows in the wind.
The EPA lead renovation rule covers work that disturbs paint in homes built before 1978. Paid contractors working under the rule must follow lead safe work practices, and the EPA recommends hiring a lead safe certified contractor for older homes.
The EPA says the rule generally does not cover homeowners working on their own home unless they rent all or part of it, run a childcare center there or flip houses. The agency recommends using lead safe work practices for do-it-yourself projects.
Work wet to keep the dust down. Mist the painted boards with water from a spray bottle before you scrape them. Catch the wet paint chips on a heavy plastic drop cloth. Follow the EPA's do-it-yourself lead safe guidance for protective gear.
Wash your hands thoroughly when you finish the scraping. Wrap the plastic drop cloth up tight with the chips inside. Check your local rules for disposing of lead paint debris.
When the framing needs a contractor
Porch decking rests on a hidden grid of heavy joists and beams. These framing pieces support the weight of the floor and the roof. A failing frame is dangerous and requires more than a simple patch.
Take a strong flashlight and look under the porch if you have an access panel. Check the wood posts holding the structure up. Wood that touches the dirt rots fast.
Building codes often require specific materials near the ground. As one state's example, Minnesota's porch guide says joists 18 inches or closer to grade must be treated or naturally decay resistant wood such as cedar heartwood or redwood. Check your local building department, since your code may differ.
Check the ledger board where the porch frame attaches to the main house. A failing ledger board can pull the porch away from your home.
Call a licensed contractor if the porch floor slopes sharply away from the house. A slight slope is normal to drain rain water. A severe tilt means the foundation columns are sinking or rotting out.
You also need a professional if multiple floor joists feel soft to the screwdriver test. Replacing a whole frame involves setting up temporary roof supports and pulling structural permits. A local carpenter can safely rebuild the support structure before you lay down the final porch decking.
More from down the street
What is making small holes in your yard and what to do
Find out what is making small holes in yard areas by checking the size, shape and mounds, then decide how to repair the lawn and stop the digging.
When and how to refinish a stained wood front door
Learn when your wood stain door needs a fresh finish and follow step by step instructions to prep, stain and seal it against the weather.
9 things not to store in your garage and where they belong
Find nine things in a garage you should never store there to protect your house from fire and pests, along with exact steps to safely move or discard them.